

Endpoint Encryption
Introduction
This procedure guide is deprecated. It was written for the 3.7 version of VT’s Minimum Security Standard.
Types of File Encryption
There are two basic types of file encryption:
- Password
- Public Key
Files may be encrypted with a password. When you encrypt a file with a password, anyone who knows the password may decrypt it. When you want to share files that have been encrypted with a password, you should call the recipient and provide the password over the phone.
Files may also be encrypted with public keys. Before you can do this, you must first obtain the recipients’ public keys. After you have those, you can encrypt the file (with the public keys) and share it with the recipients.
The ITSO approves of both types of encryption, but there are pros and cons you should be aware of:
Pros
- Passwords are more convenient for many users.
- Public Keys allow you to distribute encrypted files to many recipients.
- Public Keys allow for key escrow and make recovering encrypted files easier.
Cons
- Passwords may be weak and easy to guess.
- Public Keys are more abstract and cumbersome to use for many people.
- Public Keys require users to generate and maintain keypairs (one secret key, one public key).
- Passwords may be lost or forgotten (you may not remember the password you used to encrypt a file in 2013).
Procedures
Microsoft Office File Encryption
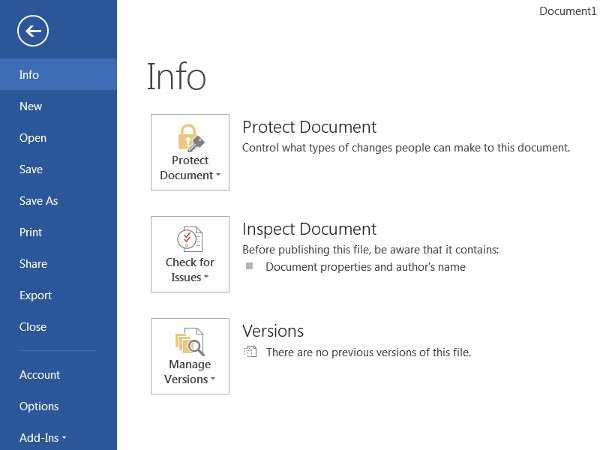
- In order to encrypt a Microsoft Office document, click the File tab to bring up the following menu. Then, view the Info section.
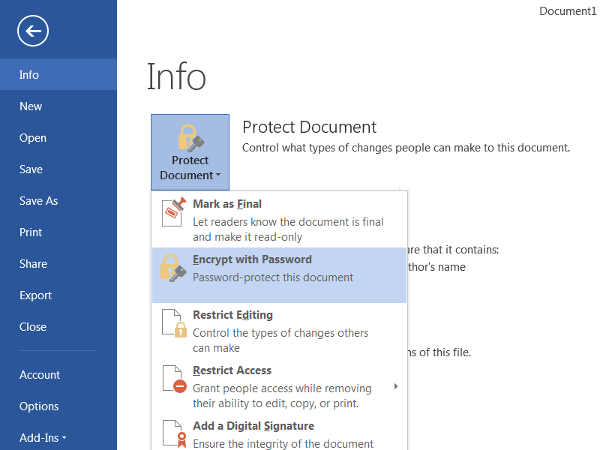
- Click the icon to Protect Document (or Worksheet / Presentation) and select “Encrypt with Password” from the dropdown menu.
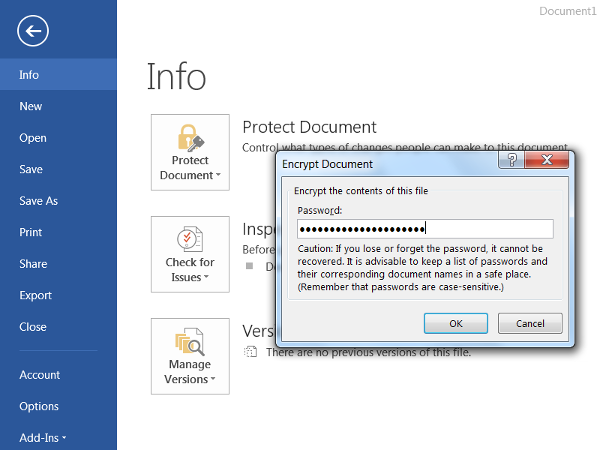
- It will prompt you to input a password to encrypt the document (a longer password is more secure). Then, click OK.
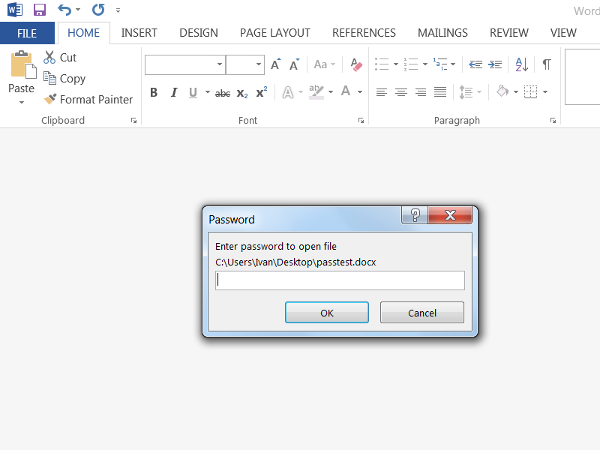
- The next time the document is opened, Microsoft Office will ask for the password before allowing the document to be viewed or edited.
PDF File Encryption
These instructions are for Adobe Acrobat Pro 2020. If you use some other PDF software, you should follow one of the other file encryption procedures listed on this page.
To share files encrypted with Adobe Acrobat Pro 2020, you can encrypt the file using a Digital Certificate, ensuring only specific people can view the document. To do so, follow the following steps.
- Go to vt.edu.
- In the search bar, search for the name of the person you want to receive the document.
- Select that person.
- Next to PDC, select and download their .pem file.
- In Adobe Acrobat, select Tools > Protect > Encrypt.
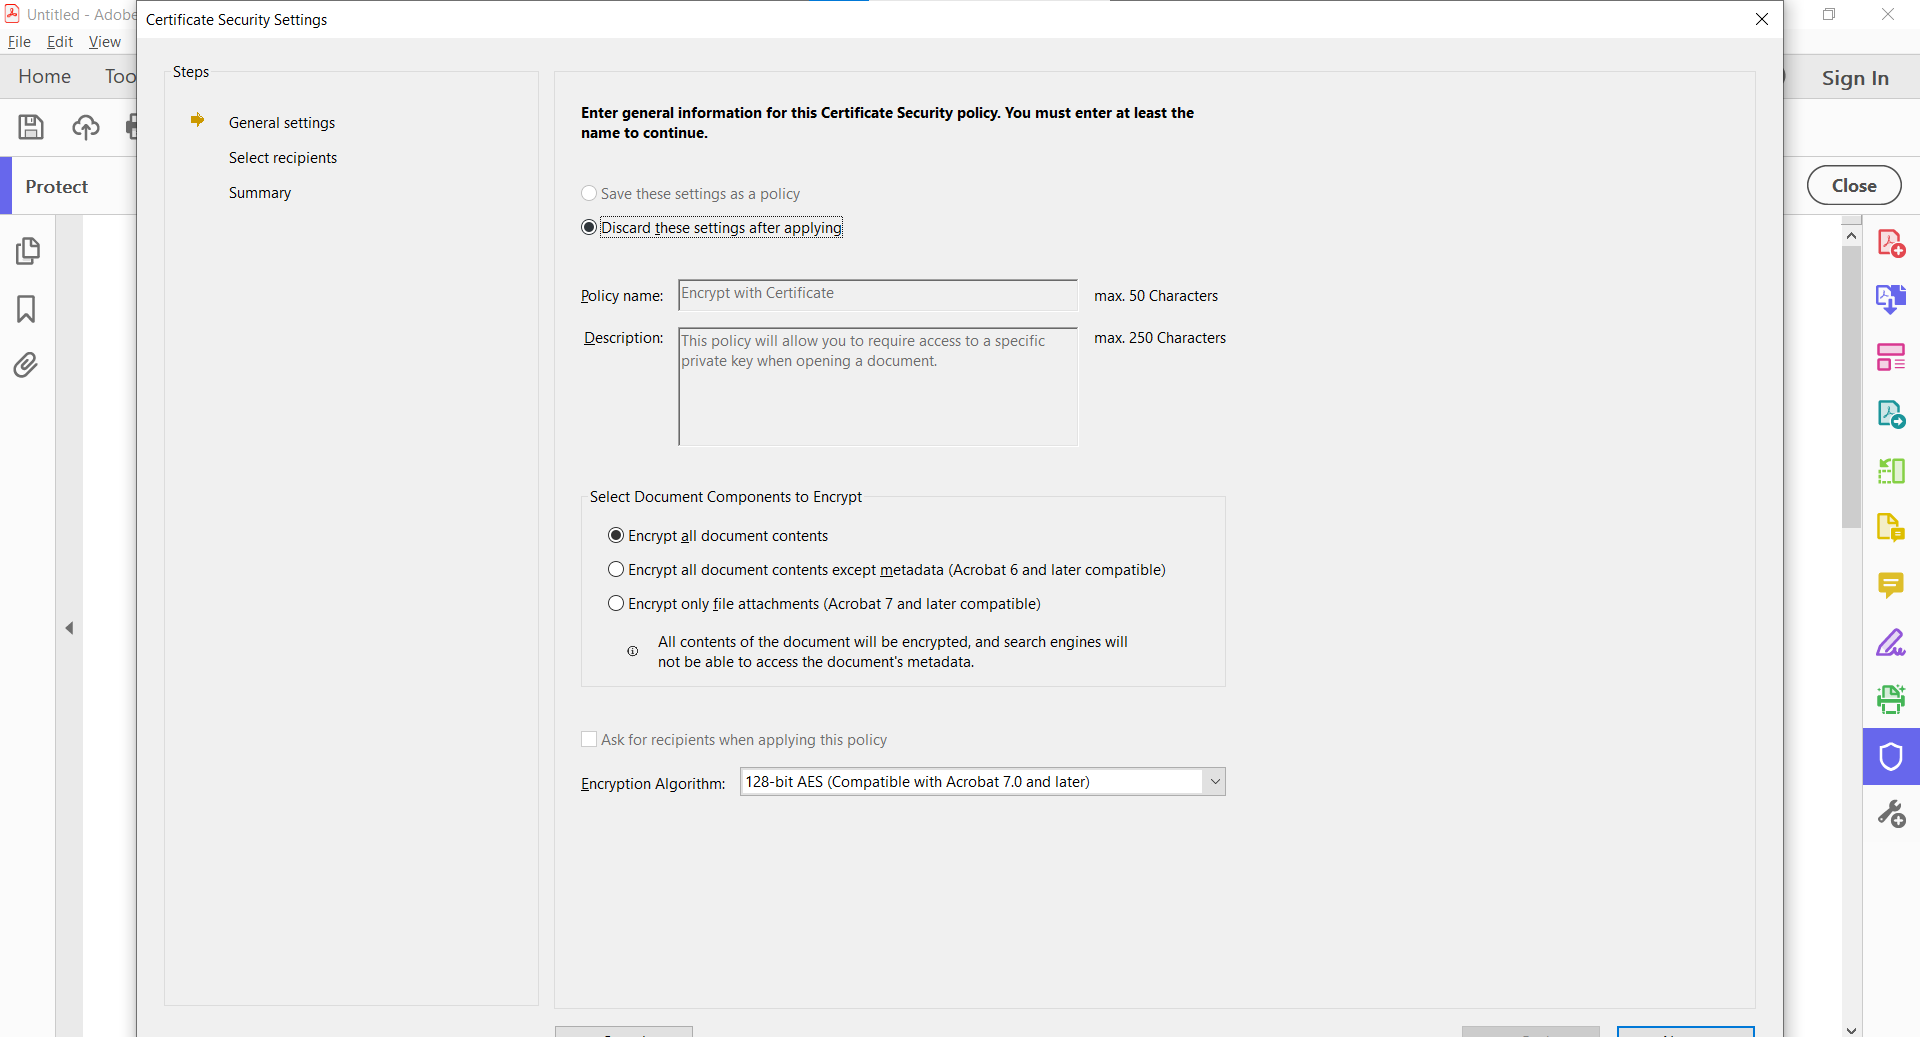
- Choose what elements of the document you want encrypted.
- Select the encryption algorithm.
- Under Digital Security, select Add Digital ID.
- Select your digital ID.
- Here you can add recipients, so select browse and choose the .pem file you downloaded.
- Select next to finish encrypting the file.
LastPass File Encryption
LastPass allows you to store files and other forms of information in your LastPass vault. This vault can be encrypted and shared with others. To export your LastPass vault, follow these steps.
- Log in to LastPass.
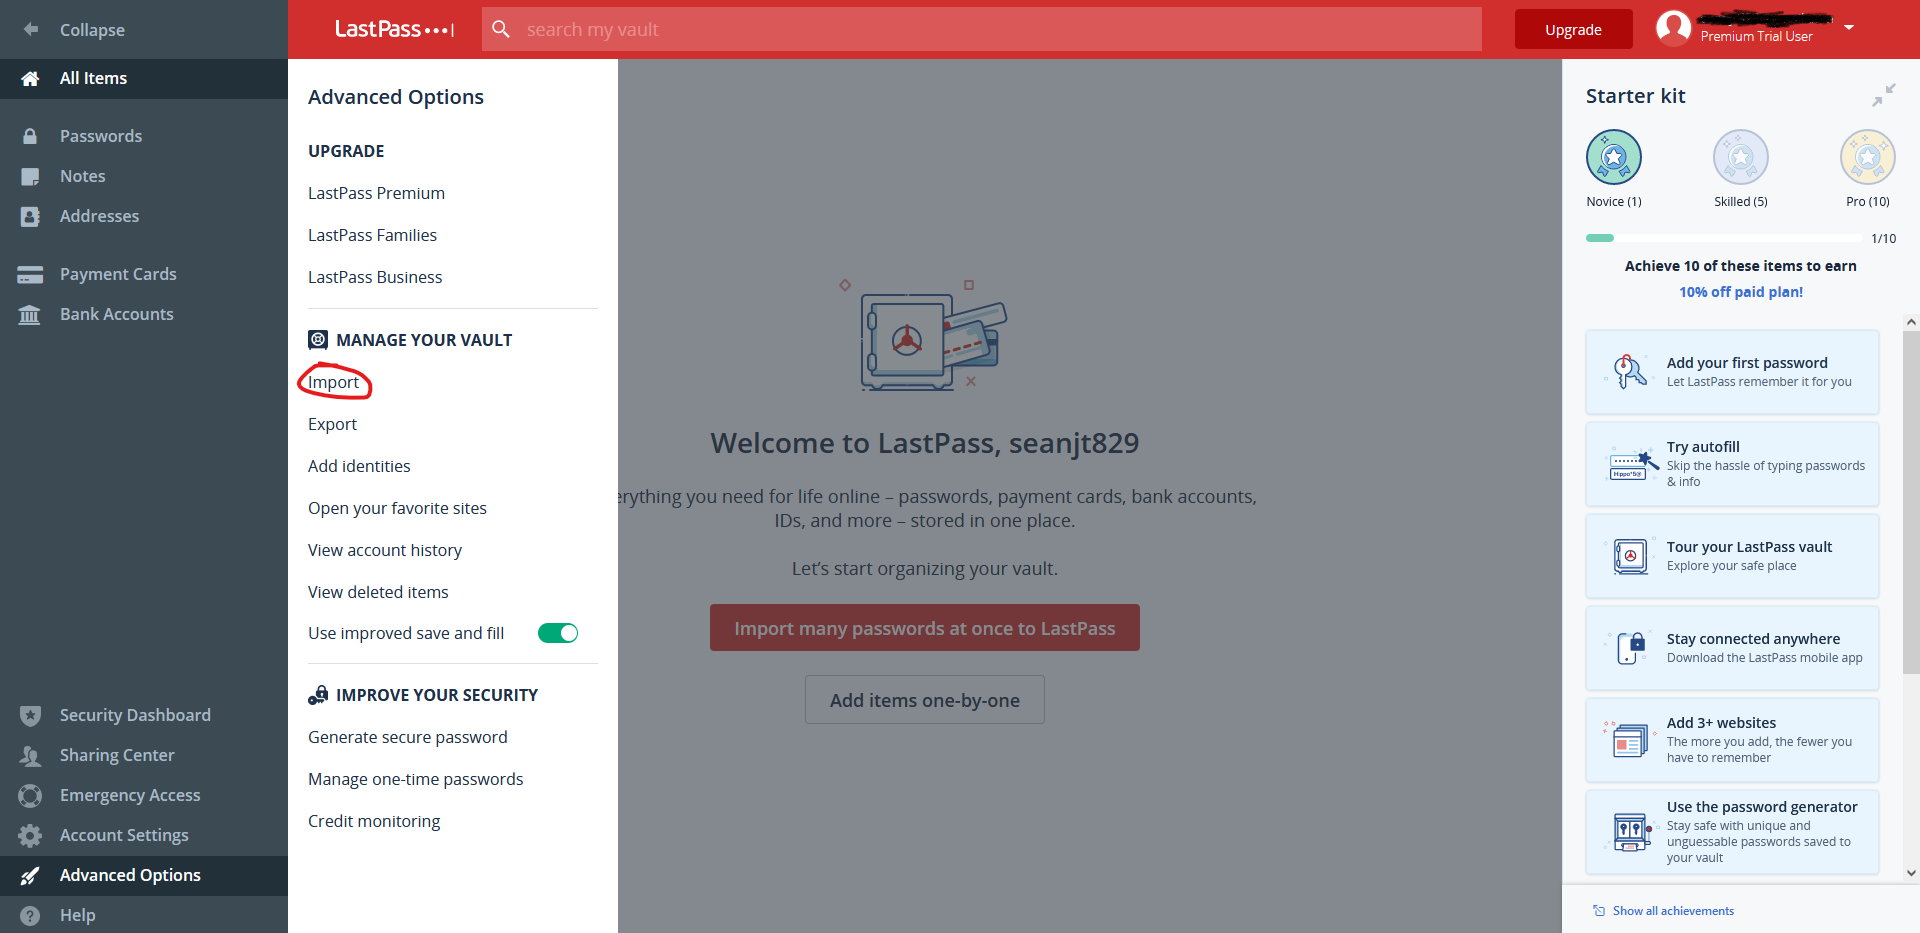
- Select Account Options or <your username> at the bottom of the menu.
- Go to Advanced > Export > LastPass Encrypted File.

- You may be prompted to enter your master password.
- Create and confirm an encryption key.
- Follow the onscreen instructions and a CSV file will be downloaded containing your LastPass vault data.
To import this data on another computer, follow these steps.
- Log in to LastPass.
- Select Account Options > Advanced > Import.
- Select LastPass.
- Browse your computer and select the LastPass encrypted CSV file.
- Enter the Encryption key.
- Select the file you want to import.
The provided information and more can be found on the LastPass support page
VeraCrypt File Encryption
VeraCrypt is an open source encryption solution that is easy to use and works on Windows, Mac, and Linux. It can be downloaded from https://www.veracrypt.fr/en/Home.html. The most common way to use VeraCrypt is to create an encrypted volume and then store files inside the volume that need to be encrypted. Steps have been provided below for the creation and mounting of a VeraCrypt volume.
Creating a VeraCrypt Volume
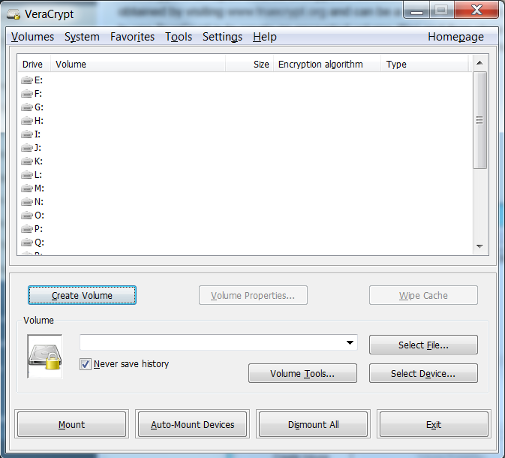
- Open up the VeraCrypt application and select “Create Volume”.
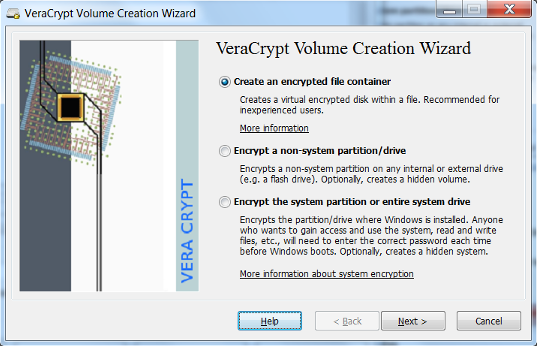
- Select Create an encrypted file container and click Next.
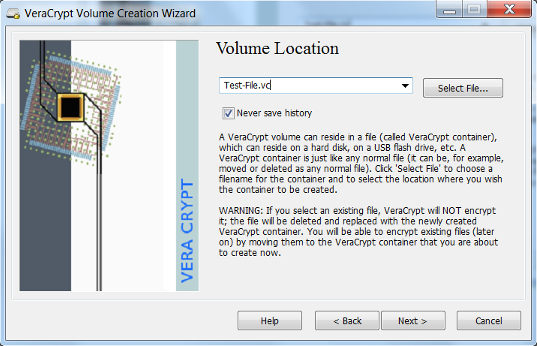
- Create a name and select a location to save the VeraCrypt volume that you will be creating and select Next. It is helpful if you create a volume name that ends with the extension
.vc. This will associate the volume with the VeraCrypt application.
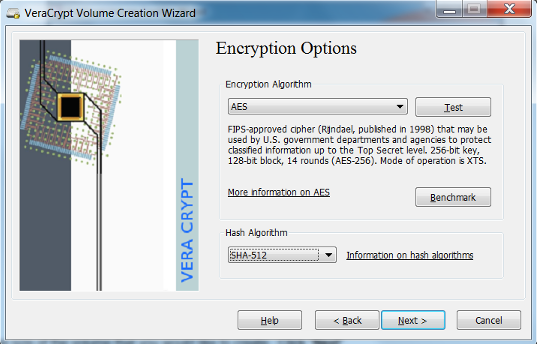
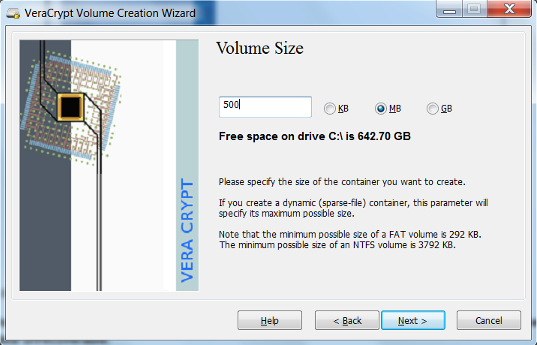
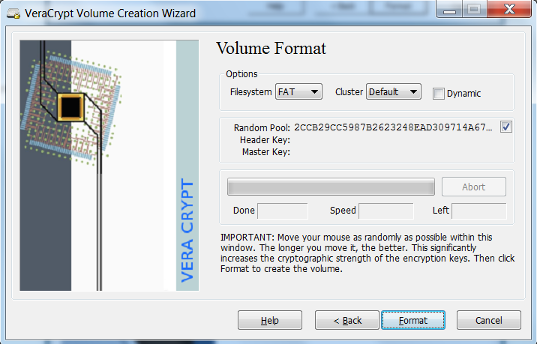
- VeraCrypt provides some options for encryption. Select the desired encryption algorithms and select Next. VeraCrypt uses the AES algorithm by default and is recommended for selection. In most cases a 500mb size volume is suitable. However this depends on the user’s need and should be adjusted accordingly.
- Create the size of the volume that you would like to create. Click Next.
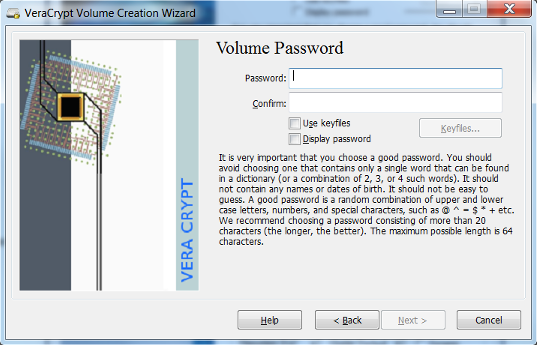
- Create a password for your encrypted volume. Click Next. The longer the password the better it is. It is important to not lose your password. A lost password will make the data unrecoverable.
- Select the file system and click Format. The default is suitable in most cases.
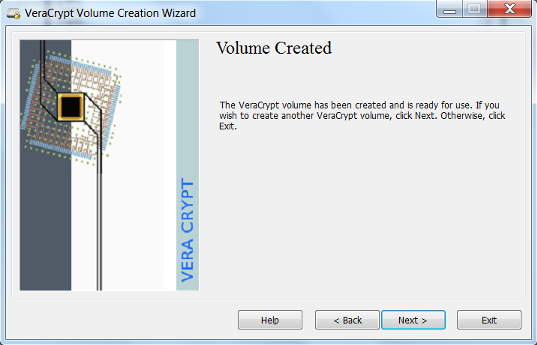
- Your volume has been created. Click Exit
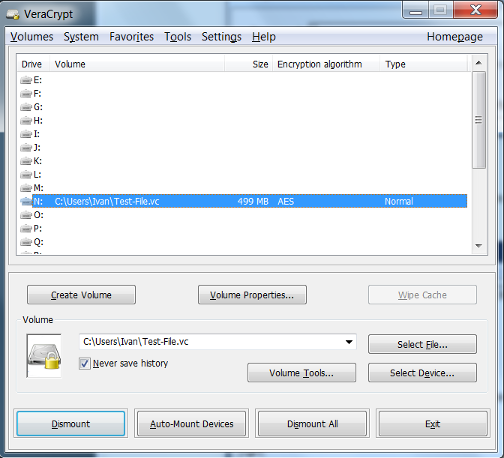
Mounting a VeraCrypt Volume
- Select the VeraCrypt volume that you would like to mount. Select the letter drive location you would like to use. Click Mount.

- Enter your password for the VeraCrypt volume. Click OK.

- The drive is now unencrypted and ready for use at the drive location you have selected. Save files and documents as you would normally do with a mounted drive.
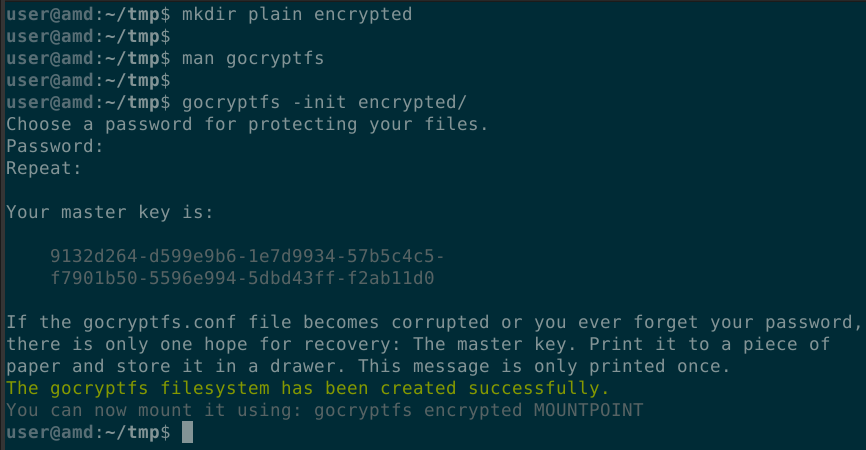
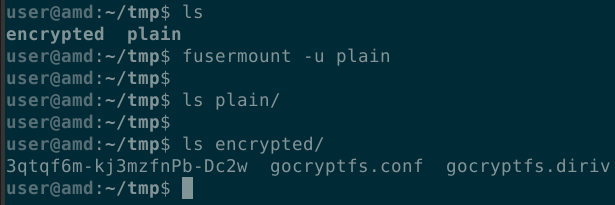
gocryptfs File Encryption (Linux Only)
- Initialize a new encrypted filesystem and set a strong, yet memorable password.
- Mount the encrypted file system and copy your files to it.
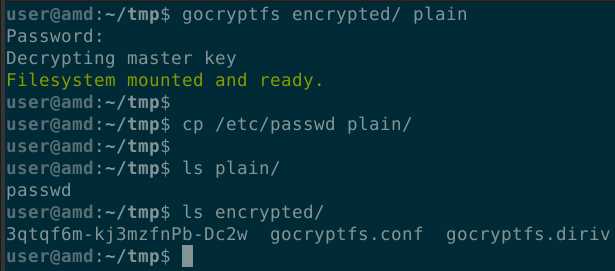
- When you are finished working with the files, unmount the encrypted filesystem.
Generic File Encryption
Any type of file may be encrypted using GPG. Both the sender and the recipient must have GPG encryption software installed as well as generated key pairs. There are OpenPGP implementations for Windows, Linux and MacOS. If you would like to use GPG to encrypt files and need expert advice on key generation management and distribution, then please open a ServiceNow request.
Disk Encryption
Microsoft Windows
Disk encryption is a great way to protect the data on a device so it can only be accessed by those who have authorization. The following information is from the Microsoft Windows Support Website
- Sign into Windows with an administrator account
- Select the Start button, then select Settings > Update and Security > Device Encryption. (If Device Encryption does not appear, follow the BitLocker encryption instructions)
- Open Device Encryption
- Select Turn On
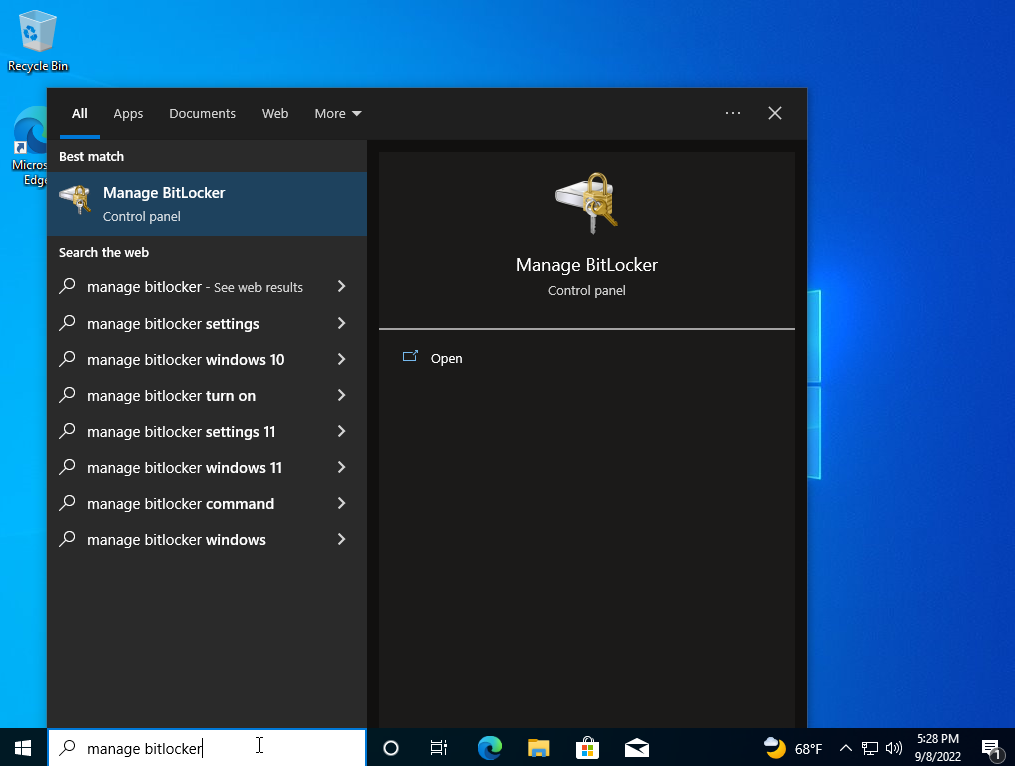
BitLocker Encryption (Only available on Windows 10 Pro and Enterprise)
- Sign into Windows with an administrator account.
- In the search box on the taskbar, type Manage BitLocker and select it from the list of results.
- Select Turn on BitLocker.
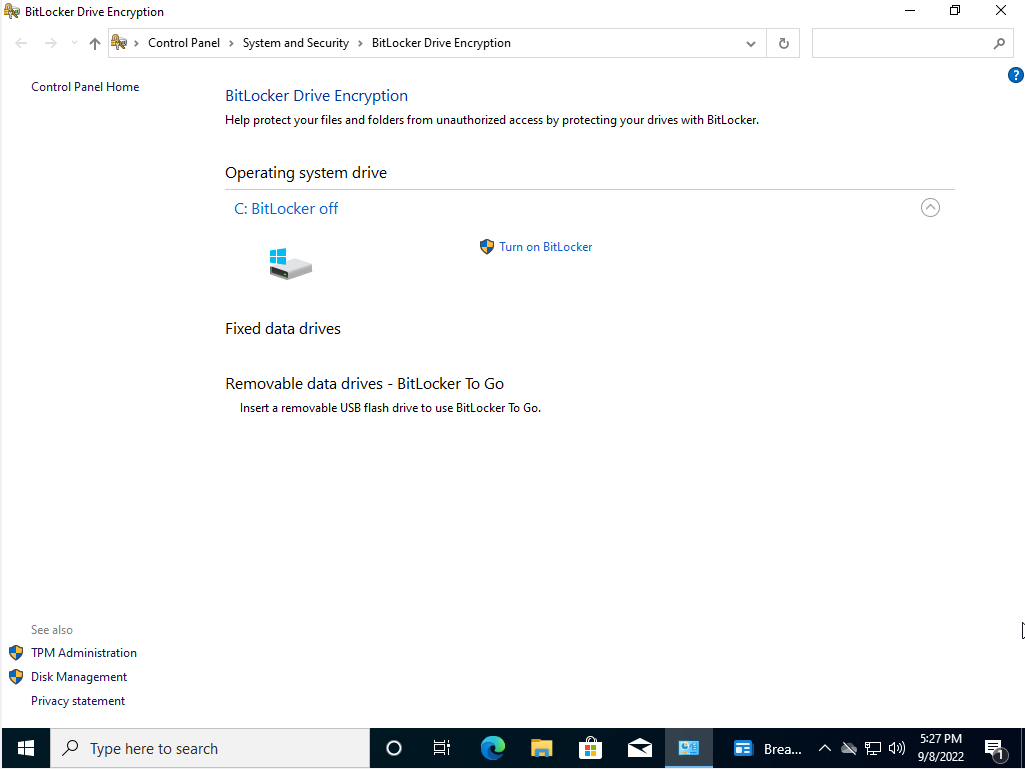
- Follow the on-screen instructions.
macOS
To enable disk encryption on macOS we will use a service called FileVault 2, which is available on OS X Lion or later.
- Choose Apple Menu > System Preferences > Security & Privacy.
- Choose the FileVault tab.
- Choose the Lock symbol, then enter the administrator’s name and password.
- Choose Turn On FileVault.
- If there are multiple users on the Mac, you will choose who will have to unlock the disk with their password.
- Choose who you will recover your disk in case you forget your password.
- The encryption will begin in the background on your Mac, you can view the process in the FileVault section of Security & Privacy.
Linux
Disk encryption is available on Linux via dm-crypt. WARNING the following will overwrite all data on the partition you decide to encrypt.
Installation
To install dm-crypt on Ubuntu and Debian, run the following command
# apt-get install cryptsetup
To install dm-crypt on Fedora, run the following command
# yum install cryptsetup
dm-crypt
To encrypt a specific partition, use the following instructions
- First we need to create a cryptographic device mapper in LUKS encryption:
# cryptsetup --verbose --cipher aes-xts-plain64 \\ --key-size 512 --hash sha512 --iter-time 5000 \\ --use-random luksFormat /dev/<name of partition> - Follow the on-screen instructions to create a password
- In order to unlock the device, run the following command
# cryptsetup open --type luks /dev/<name of partition> <device label> - You can then mount the device to transfer data
# mount -t ext4 /dev/mapper/<label> /mnt - And unmount the device when you are done
# unmount /mnt
cryptsetup close <label>
Data in Transit Encryption
Data is in transit when it is sent over a network. Some common examples are:
- Sending email
- Sending text messages
- Entering data into website forms
- Uploading files to a website
If you need to send sensitive data to someone, complete the following steps:
- Put the data into a file.
- Encrypt the file using one of the file encryption methods described above.
- Attach the encrypted file to an email, or place the encrypted file in your VT Google Drive.
- If you used a password for encryption, call the recipient on the phone and provide the password or share the password with the recipient via LastPass.
Note: If you are entering sensitive data into a website or uploading files, ensure the website is using HTTPS.
Other Use Cases
If you have an endpoint encryption use case that is not covered in this procedure, please contact the VT IT Security Office for a consultation.